Note: All screenshots and steps were taken on a Mac, PC process is similar.
1. Create a New Event
Apple Calendar
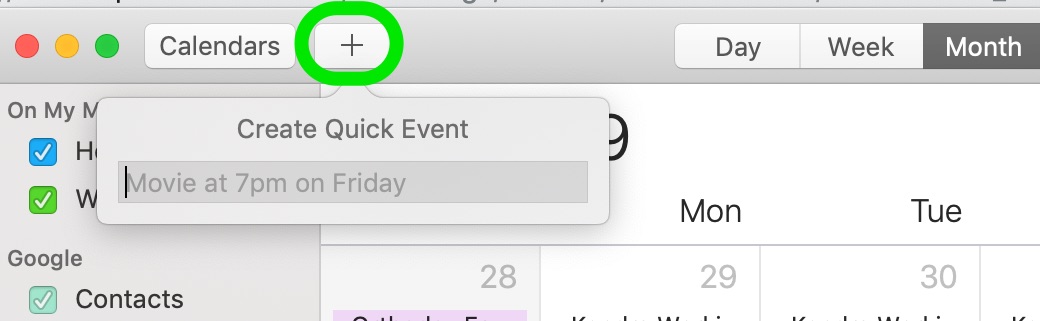
Open Apple Calendar and click on the "+" sign in the top left corner of the window. A pop-up will appear. Enter the name of event in the "Create Quick Event" box and hit return/enter.
Outlook
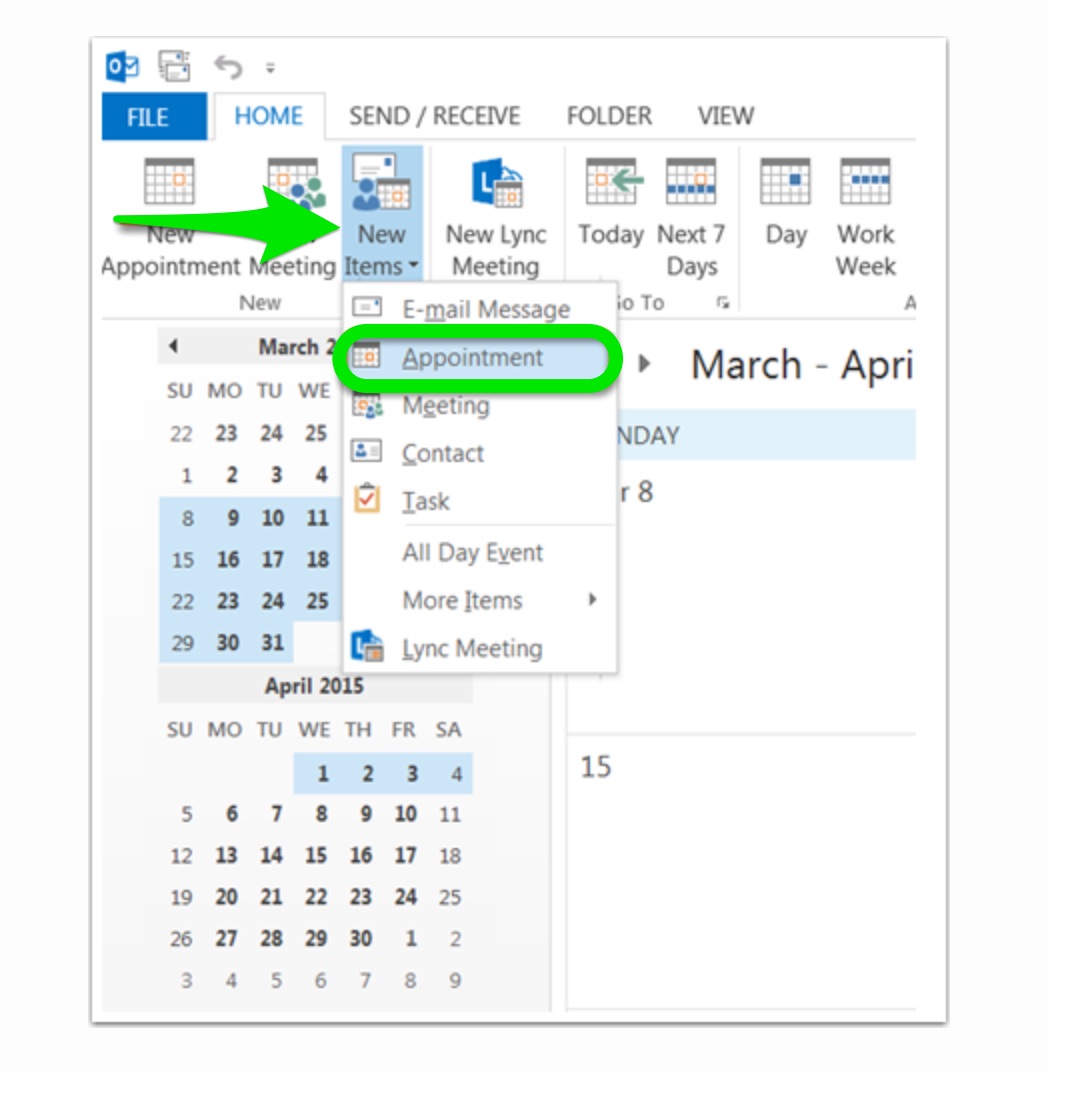
Click "New Items" icon or click "New Appointment" in the navigation bar and select it from the dropdown. Create an appointment, not a meeting, because this is an individual invite and other people from recipient's calendar will not be included on it. A calendar invite will pop up for editing.
Google Calendar
Open Google Calendar in a new browser window. Click the red "Create" button on the top left side of the screen. A new event window should open.

2. Set Details for Event
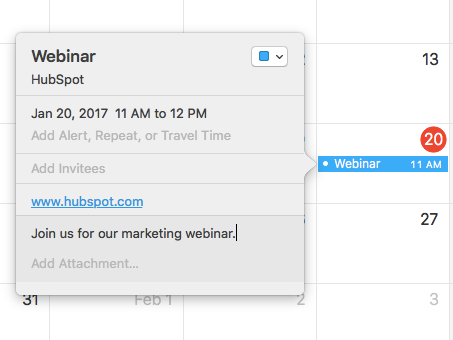
While Outlook, Apple Calendar, and Google Calendar events have slightly different formats, all still need the same components for each one:
- Event name
- Location
- Time
- Event description
- URL of event's landing page
- Optional event alert
Below are examples of how these details look in the different applications, as well as a clarification of what information and format to use for each of these components.
Apple Calendar
Outlook

Google Calendar
The Details Needed
Event Name (Subject field in Outlook)
Location
Physical address of the event (one line, such as "123 Business Ave, Springfield, TX") or the landing page URL, in the case of an online event.
Time
Enter the start and end dates and times of the actual event.
Alert (Optional)
In Outlook, set a time for one reminder to go off (such as one hour before). In Apple Calendar and Google Calendar set multiple alerts.
Below is an example of an alert sequence in Apple Calendar that reminds folks about an event:

URL of Event Landing Page
Description
Event's details, which goes in the "note" section of Apple Calendar invite, or in the body of Outlook invite, or in the "description" text box in Google Calendar.
3. Save Event
Outlook
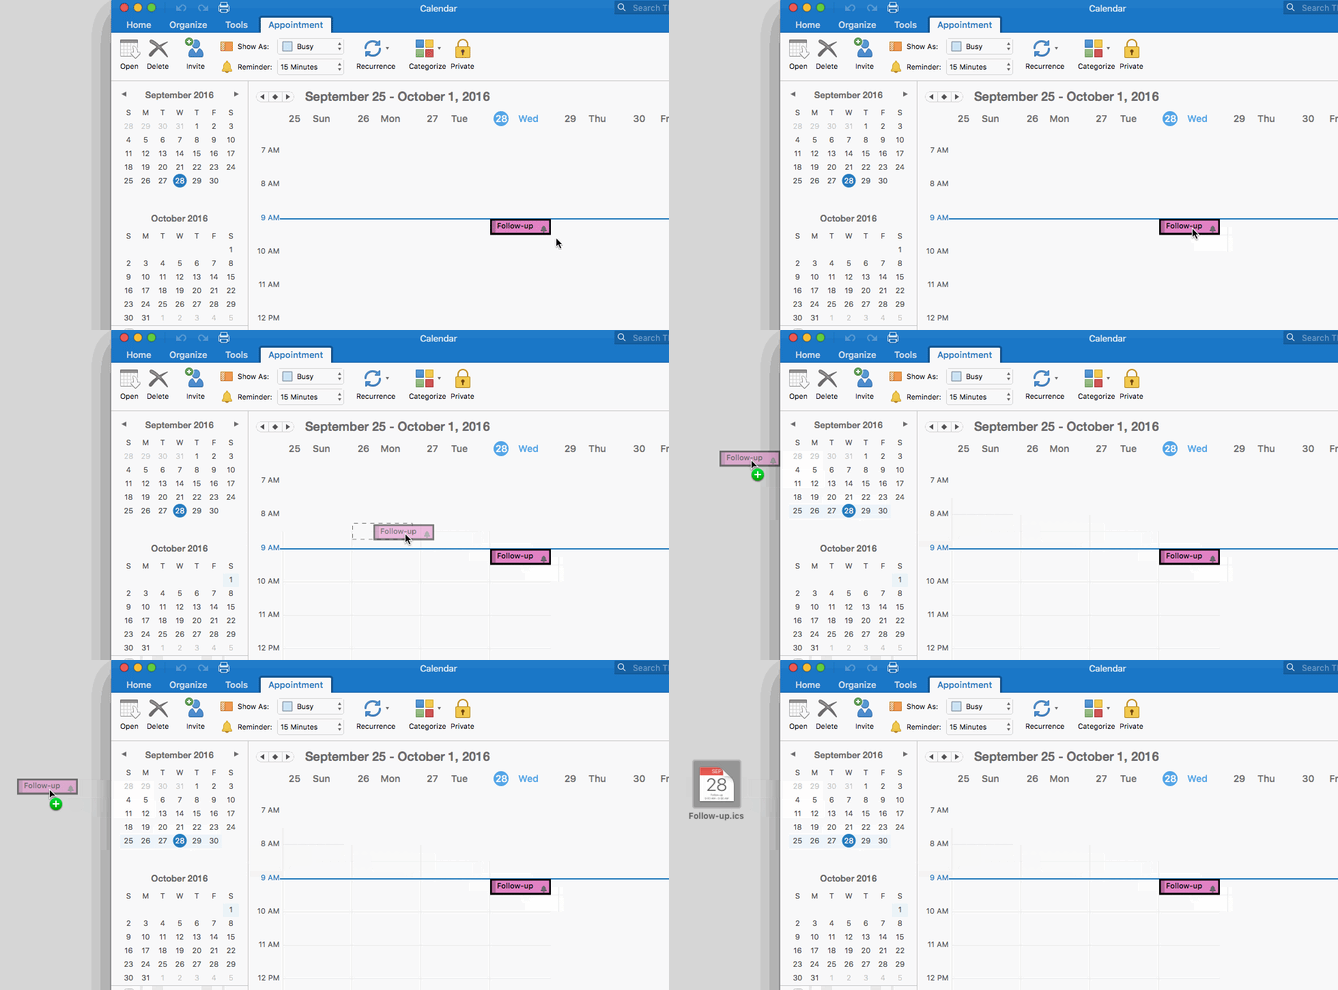
Click "Save and Close" in the top-left of Outlook invite to save it to calendar. Then, click and drag the appointment from Outlook calendar to desktop to use for email invite.
Apple Calendar
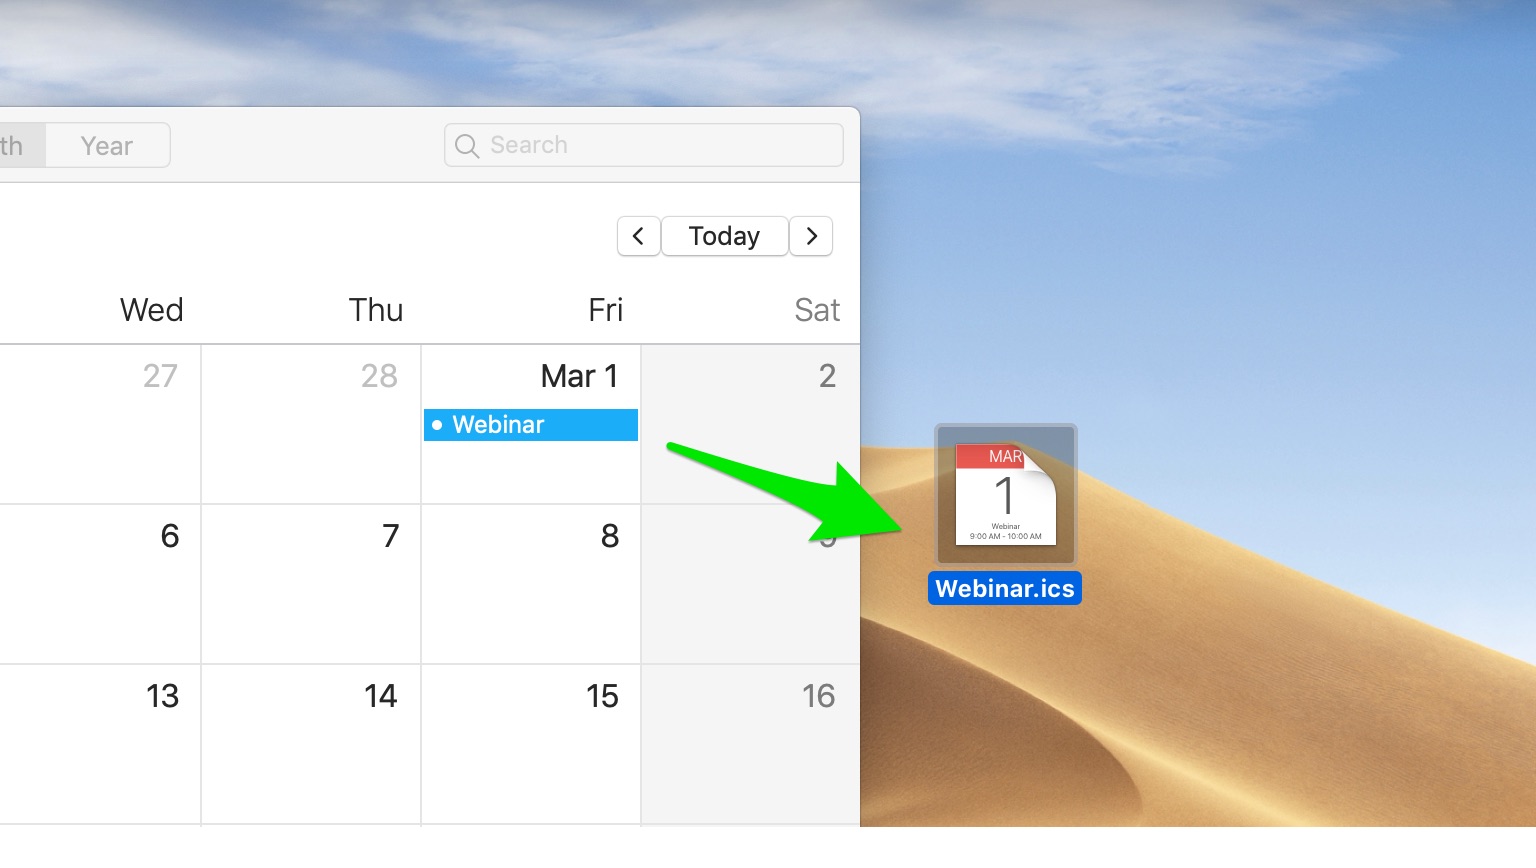
Click "done" to save it to calendar. Then, navigate to the event date on calendar, click on the event, and drag it to the desktop. Now the .ics file is ready to use for email invites.
Google Calendar
Click "Save". Re-open the event and click on "Publish Event". A pop-up will appear with an embed code and a link can easily copy and paste into a marketing email.

4. Insert Invites Into Email
For Apple Calendar and Outlook invites, both need to attach the .ics file link to text or a button. Highlight the text or click on the button with the link, then upload the .ics file to file manager and attach it to that text or button.
For Google Calendar invite, link the text or button to the event URL (Step 3 of this tutorial).